Showing posts with label 3D embossing folder. Show all posts

Wednesday, December 3, 2025

It's a Banner Holiday Card

 One of my favourite prompts at the Jingle Belles Challenge is the Banner inspiration one although I love all their prompts (some better than others) although I didn't manage to do a lot of the challenges I'm going to try harder in 2026 because I am scrambling to get enough cards to mail.  My card zeroed in on the pale teal and the muted trees, the glittery "Jingle" and instead of snowflakes I used trees. Check below for the inspiration banner.


I used a 3D embossing folder, mirror cardstock for the trees and some glitter cardstock for the Merry, Christmas was stamped on a scrap of pale teal as stamping on the embossed part would be messy.


Finished the inside with a scrap of teal, a hero arts sentiment and some more silver trees.

I am adding this to:

Jingle Belles Challenge ~~ Banner Holiday

Thanks for stopping by and keep on crafting.


Tuesday, April 23, 2024

Mama Mia

 Now is the time to get a Mother's Day card made for your Mom, Mother-in-law, Stepmom, Grandma, Great Grandma and if you are like me with none of the above you make a card for another important woman in your life, and this is what I made for the challenge at Shopping Our Stash. 


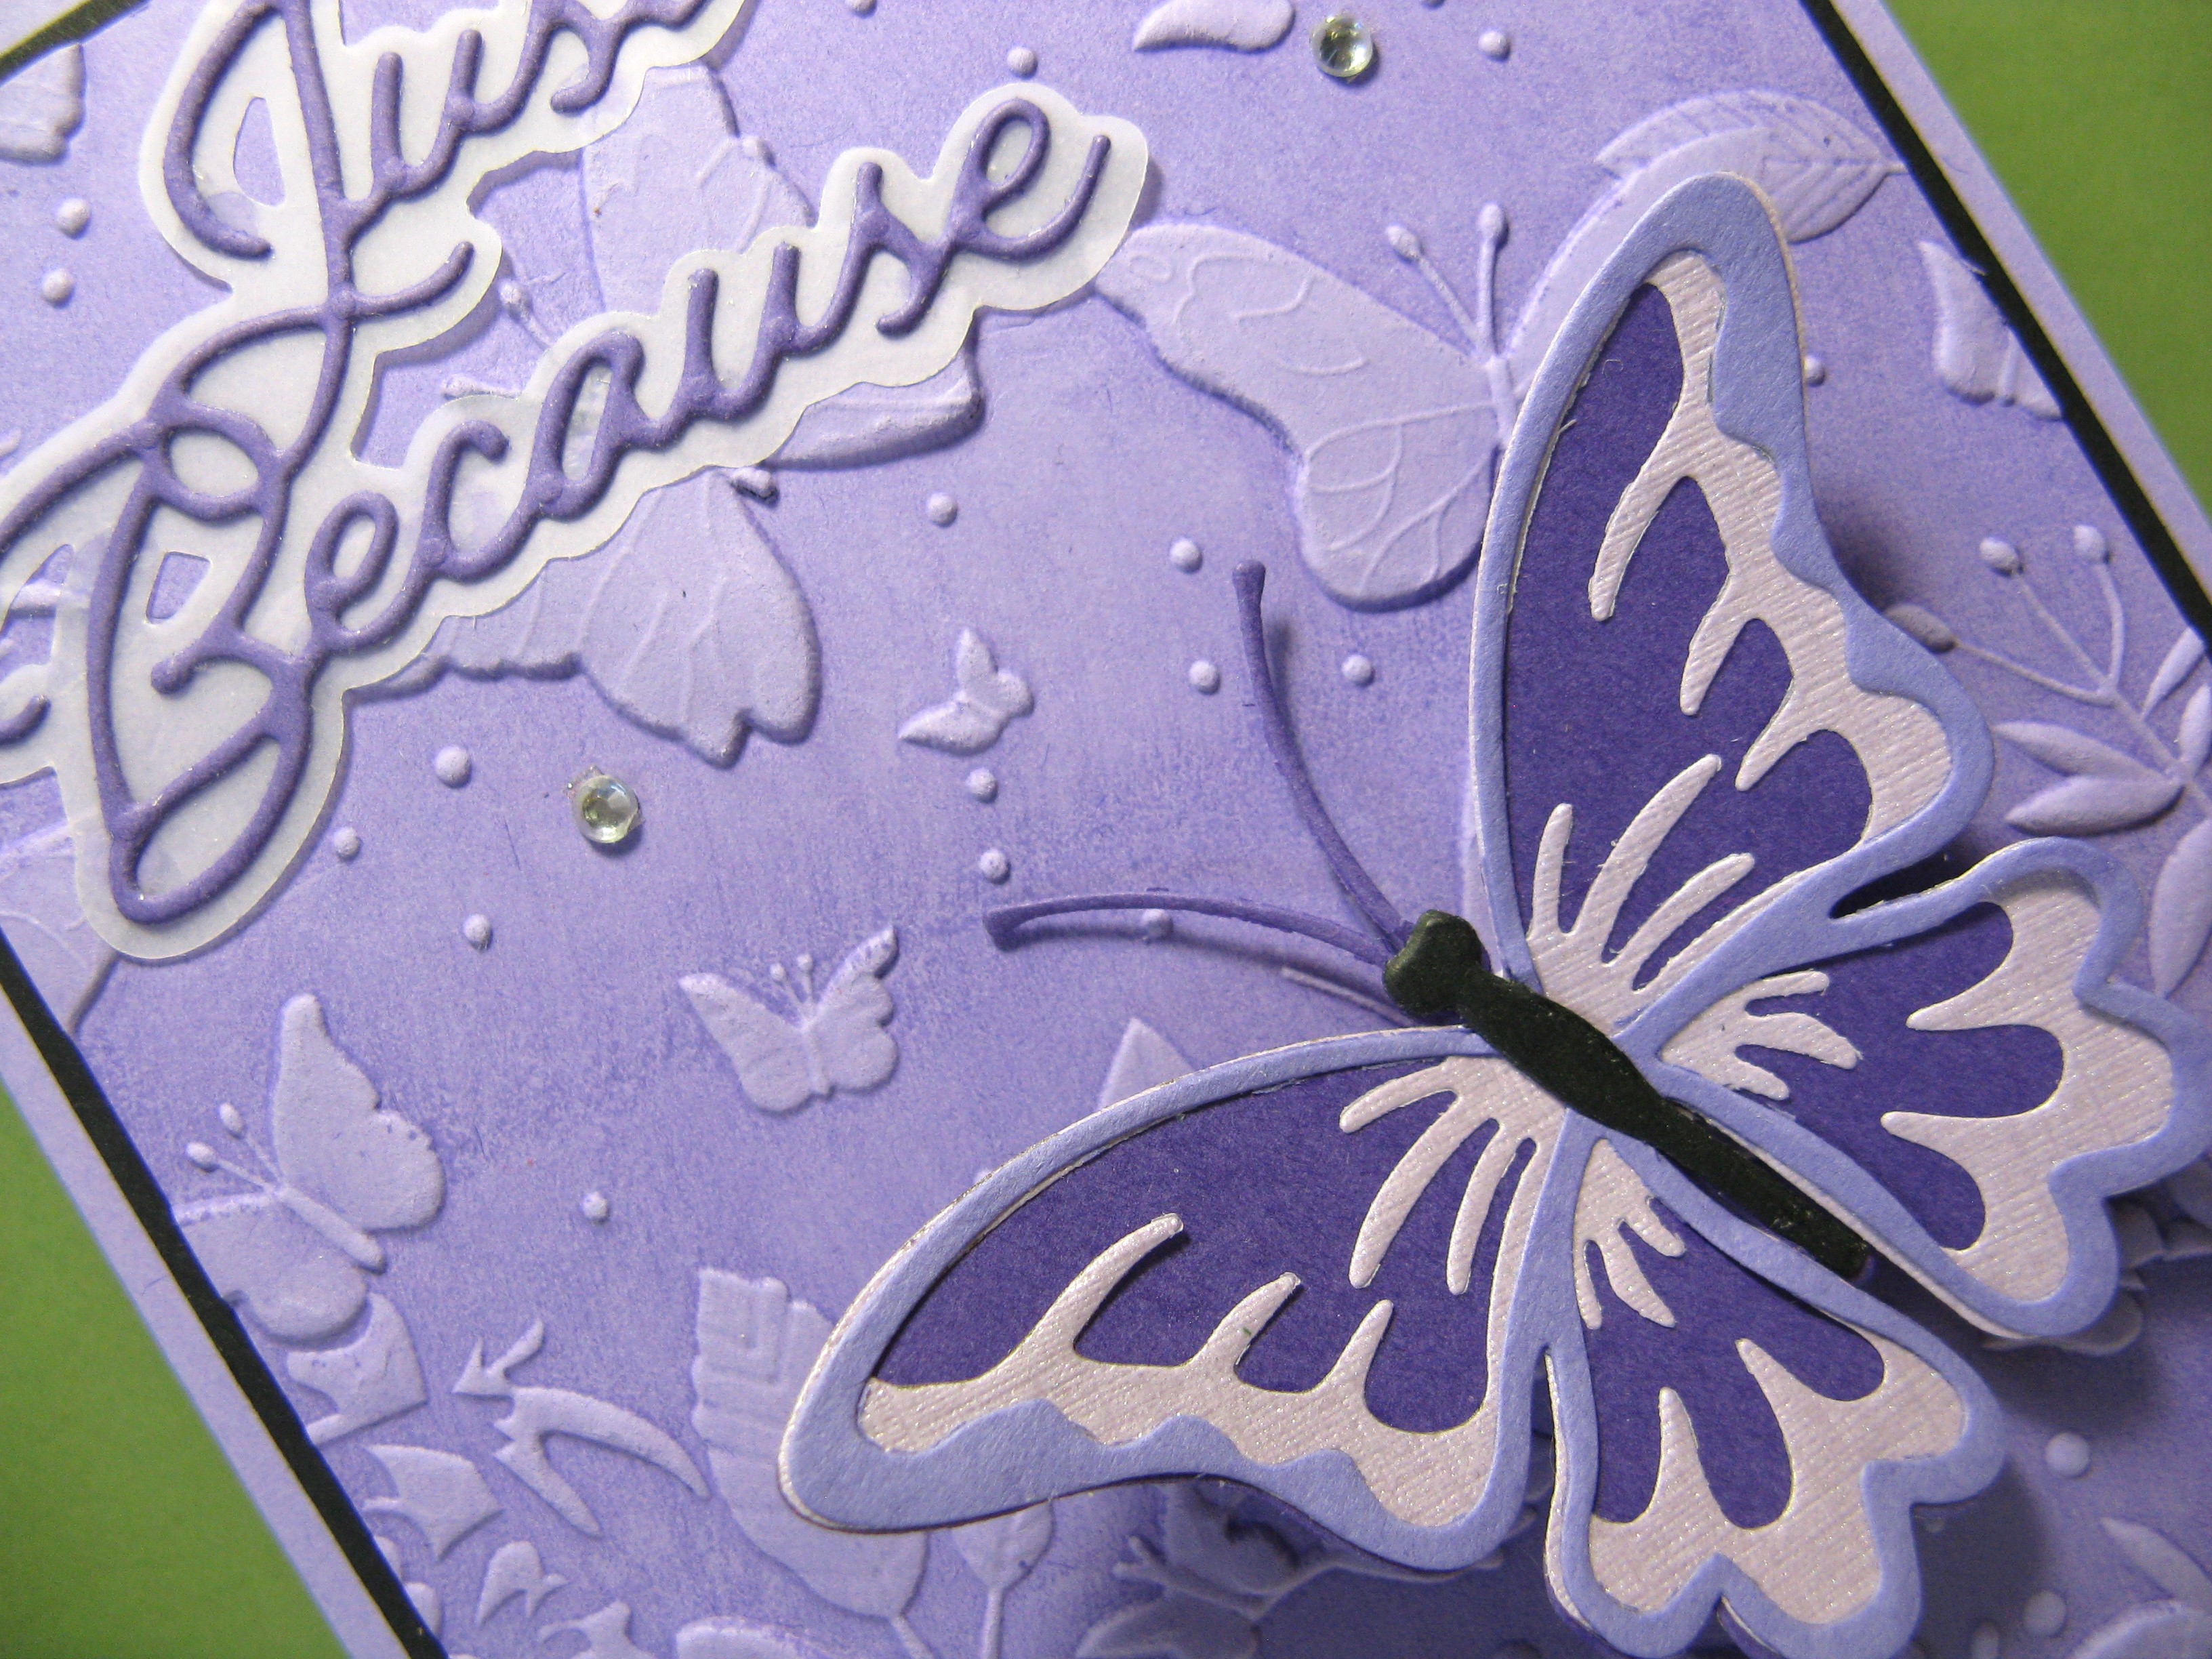
My special person is my Daughter, she loves the colour purple (all shades)  She is just a text or call away if I need help.
The 3D butterfly folder is a newer purchase as is the three layer butterfly but never been used until now but the Lavender Lace cardstock and ink pad are ages old. I even had a re-inker for the ink pad. The light purple part of the butterfly was a scrap of thin shiny paper I found in my scrap file box. The technique I used for the folder is ink up the debossed side of the folder add the same colour cardstock as ink so it darkens the recessed areas. It also looks great done on white cardstock.  I found this video quite helpful.


Here is a closer look at the butterfly and the sentiment The sentiment is a NBUS I'm sure it's over a year old and I just got it out to use. I layered it on an extremely ancient slightly damaged 12 X 12 piece of vellum that I have no idea where it came from it was just loose between the cardstock. 


Finished the inside with a couple of scraps of cardstock and a butterfly stamp. It is ready for a hand written note to tell my daughter how important to me she is.

I am adding this to:
NBUS challenge ~~ #61 3D folder, 3 layer butterfly and the sentiment 


Thanks for spending time here today and stop over at the MAIN BLOG and check out the gorgeous Mama Mia cards the design team have created to inspire you.


Tuesday, February 27, 2024

It's Not Easy Being Green..............

 Hello and welcome to a NEW challenge at Shopping Our Stash as Kermit always says...It's not easy being Green which is our challenge for the next fortnight. We want to see projects that are mostly green. Sounds like an easy peasy challenge unless you are green challenged as I am except I love lime green so that is what I decided to use for my card. 


Since we were shopping our stash I dug deep for long retired Gable Green cardstock and ink as well as Green Galore for the mat and die cut. I tried a new technique with the 3D folder, ink the debossed side, spritz and run it through the big shot, I feel it doesn't have enough dimension next time I will add a shim so the embossed parts are sharper and maybe go heavier on the ink.


Finished the inside with a cling stamp from Stampendous, a couple of scraps and a trio of rhinestones.

Here is the proof of the age of my ink and cardstock.

The ink pad is the really old style and I was surprised it wasn't totally dry.

 I am adding this to:

Seize the Birthday ~~ Anything goes

Thanks for checking today and don't forget to check out what the rest of the Design Team have made for your inspiration.


Tuesday, February 13, 2024

Put Your Best Face Forward!!

 Happy Galentines day to my female followers!!

No I don't have a Galentines or Valentines card to show you (never thought about making one of them) but I do have one for our NEWd challenge at Shopping Our Stash, put your best face forward and what that means is put a HUMAN face on your project. 


Well the AI Girlfriends faces are the most recognizable I have in my stash, and I have lots and love them all. Now I started out with colouring my image and when done I was sorting through some scraps of cardstock and well what did I spy but a 3D embossed floral background and in the same pile was the Happy Birthday to You die cut, BONUS!! don't you love it when the universe aligns things for you?


I added the perfect sentiment to go with the image on the front and layered it on, Yes, another scrap of turquoise cardstock from that pile, I cut it with the postage stamp die to use on the front but saw the embossed piece, well wasn't going to put it back into the "pile" so I used it on the inside. 

I am adding this to:

Snippits Playground ~~ Challenge 473


Seize the Birthday ~~ Anything Goes


Thanks for stopping by today and don't forget to check out the Main Blog and see what the rest of the team have made for the challenge. 


Sunday, June 4, 2023

Happy Little Stampers Christmas Challenge for June.

 How can it be June already? And we are having Summer weather and I am not happy that it is the high 20s and it feels hotter. So what can you do during a heatwave? well here is an idea to cool off ~~ get started on your Christmas/Holiday cards. Make a snowy scene, stamp a snowman, make it into a snowball fight then add it to the Happy Little Stampers Christmas Challenge, If you don't want to use the option of make a scene then just go with the Anything Goes option. 


I love making scenes with cute penguins, adorable gnomes and even a few snarky cats but this time I went for soft and pretty.


Turquoise and Pink are my favourite non-traditional colours for Christmas so I inked the flatter side of a 3D folder with distress oxide inks, spritzed it with water and added regular white cardstock to it and rolled it through the big shot, I loved the way it pooled in spots. I attached it to a turquoise layer and on a white top fold base. To finish it as a scene I cut two stags out of white glued them together flat attached the feet and popped the body of the stag up. I couldn't decide on a sentiment, I wish I had a "peaceful" die cut.


A bit of a closeup to show the 3D effect and how the stag is elevated.

Thanks for stopping by today and how to see your new holiday card in our gallery.


Monday, April 3, 2023

Tinsel Tree Inspired.

 Hello fellow crafters I'm here with my card for the Jingle Belles Rock Challenge ~~ Tinsel Tree Inspired.  I don't have any of those cute trees but I do have a 3 D folder that has great trees and I dove right in inking the folder with 3 soft shades of distress oxide ink on it (as per a video) spritzed it with water until the ink beaded up added 110 lb. cardstock and ran it through the big shot, awesome it worked the first time, although a little softer colour than I had hoped but I was happy. 


I cut 2 sentiments and layered them for dimension and I thought that is all the card needed, I wanted the embossing folder to shine. I added wink of stella to a lot of the snow dots. The embossed layer was attached to a narrow black border to hi-light the image then on a pale turquoise top fold base. 
I always struggle with picture prompts as too many ideas race through my head. 


Finished the inside with a vertical sentiment from Stampabilites. 

I'm adding this to:

Jingle Belles Rock Challenge ~~ Tinsel Tree Inspired


Thanks for dropping by today I am still a few cards behind where I want to be but hopefully I will find some crafting time before the challenge closes on Wednesday.